CSC105 Backend: Authentication & Cookie
From the last session, we all have done the API endpoint implementation using Node.js to do database operations from API calling. Did we spot some missing part of our API? How can we separate operations and permission based on each user?
Authentication
Most of website needs authentication for user to signup their account and sign back in at anytime they want to access the data. Most of authentication terminology is use Username (oe Email) and Password as credential to login to the account. However, there's other authentication mechanism to learn more here:
- OAuth (e.g. Sign-in with Facebook/Google/etc.)
- Suggested learn more keywords:
- google oauth for web example
- how to implement signin with facebook on react and nodejs
- firebase authentication for web getting started
- firebase authentication react and nodejs
- spotify developer sign in example
- Related links:
-
- Firebase Authentication (https://firebase.google.com/docs/auth)
- Google's SSO Concept Blog (https://developers.google.com/identity/protocols/oauth2)
- Spotify's Guide on how authorization flow works (https://developer.spotify.com/documentation/web-api/tutorials/code-flow)
-
- Examples:
- CSC105 Spotify Scraper (Sign-in with Spotify)
- CSC105 SQL Playground (Sign-in with Google)
- KMUTT Adobe License, https://license.kmutt.ac.th/ (Sign-in with Microsoft)
- Suggested learn more keywords:
- Signle-Sign-On (SSO)
- Suggested learn more keywords:
- what's sso
- ldap benefit for organization
- ldap vs saml
- what's active directory
- Examples:
- KMUTT sinfo (https://sinfo.kmutt.ac.th/)
- SIT CSGIT (https://csgit.sit.kmutt.ac.th/users/sign_in)
- Key informations:
- OAuth use redirection of user to the provider's website for grant the access of user's profile and access to the user data (as you seen in the Google Consent Dialog before logging in to the system)
- SSO is mostly used in organization which user credential are stored on only single source and many of trusted website inside organization can implement the login to access the same account data in the organization without needing to create an account for each service.
- You can see that many of KMUTT websites (that are in the example) are using SSO for you to use only one KMUTT Account for all these service. And the login flow is done within the website without needing to open Consent Dialog like Signin with Google or any other OAuth login flows.
- Suggested learn more keywords:
- Passwordless Signin
- Suggested learn more keywords:
- what's passwordless web authentication
- what's security key
- password vs hardware security key
- webauthn concept
- webauthn demo
- Examples:
- YubiKey WebAuthn Demo (https://demo.yubico.com/webauthn-technical/registration)
- Google's Security Key 2-step authentication (https://myaccount.google.com/two-step-verification/security-keys)
- Thun's Diary (https://beta.bsthun.com/diary)
- Key informations:
- WenAuthn and Passkey are new technology developed in last few years, so will you see not much example website implemented it.
- Suggested learn more keywords:
This is just the guide if you interested and want to learn more on alternative authentication mechanism. But the next step after user has authenticated, how can store that this user in this browser has logged in, and who is it. The answer is Cookie
Username & Password Login
For backend development, let's continue creating signin endpoints from the lab last week.
Lab Setup
-
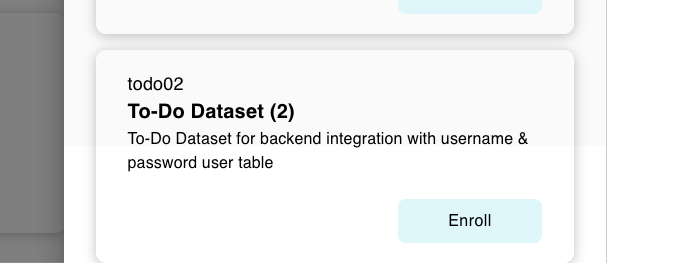
- Back to SQL Playground, again enroll the To-Do Dataset (2)

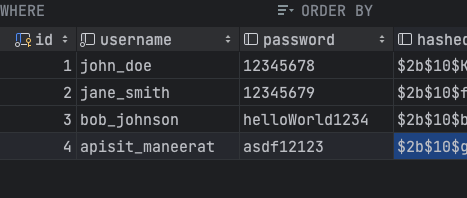
- Browse the database you enrolled, in the table users you will see pre mock-up password and hashedPassword like this:

- Let setup Node.js project for connecting to the database which the connection details provided in the lab enrollment of the todo02 lab, and have express.js setup with a simple endpoint (e.g. GET / and get a Hello World response). Use last week's guide to start a new node.js project. The setup checklist:
- Have some neccessary dependencies properly installed (express, mysql2, body-parser)
-
const express = require("express");
const mysql = require("mysql2");
const bodyParser = require("body-parser");
-
- Have MySQL connection initialization and connection
-
const connection = mysql.createConnection({
	host: "server2.....",
	port: "61..",
	user: "lab....",
	password: "<use your own password>",
	database: "lab....",
});

connection.connect(() => {
	console.log("Database is connected");
});
-
- Have express app instance setup
-
const port = 3000;
const app = express();

app.use(bodyParser.json({ type: "application/json" }));

app.get("/", (req, res) => {
	res.send("Hello World!");
});
-
- Have some neccessary dependencies properly installed (express, mysql2, body-parser)
- Try running your boilerplate of Node.js project setup from step above. Make sure the code can properly connect to the database and start express web server on http://localhost:3000. The common problem you may face is:
MODULE_NOT_FOUND: You may forget to install dependencies to your newly created Node.js project. Try runningnpm i express mysql2 body-parser- App shows only
database is connectedand immediately stopped: You just copied the code from step 3 which is not a complete setup. Go to the Node.js express project guide and see what's missing (Hint: did your app start listening for HTTP connection?). - If you still facing problem please call mentor!
- If your app is started properly and able to get Hello World response from http://localhost:3000, you're now ready to go!
- Back to SQL Playground, again enroll the To-Do Dataset (2)
Basic Authentication
Then, after we have the boilerplate of Node.js Express application, we're going to implement the simple username/password endpoint.
Login implementation
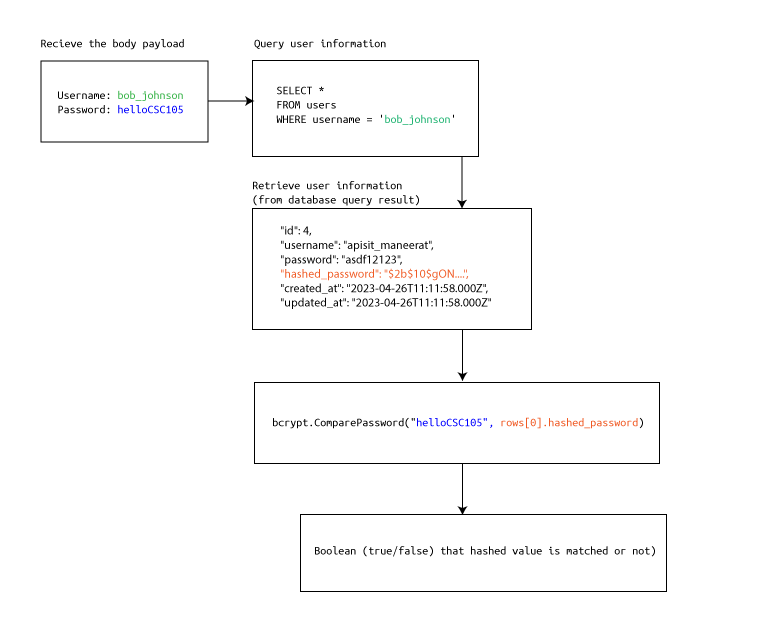
We're implementing the login endpoint functionality by creating a new POST endpoint at the path /login/basic. The concept are shown like this figure:
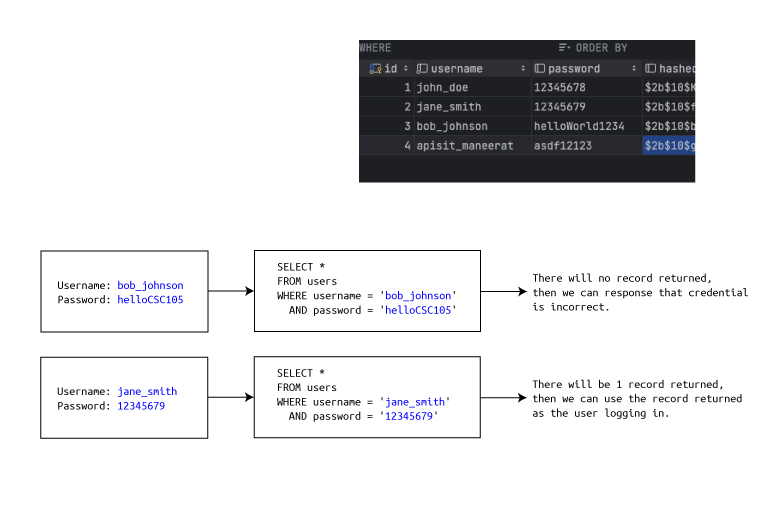
There's only few steps of the endpoint functionality. The concept is:
- Recieve the username and password parameter from the user (as body payload, in this case).
- Use the username and password to construct SQL statement.
- Query the SQL statement and use the query result for determine whether login credential is match users in the database or not.
- Hint: try googling "
" - Hint #2: when you get the number of rows returned, use that value for if else condition to check whether 0 or 1 rows returned. If 0 row returned, do
res.send("Login credential is incorrect"). If 1 row returned,res.send("Login credential correct").
- Hint: try googling "
Let's try implement this login into your login endpoint by yourself first. If you really doubt about it then see the code example: (again, please try on your own first before see the code example!)
app.post("/basic/login", (req, res) => {
	const username = req.body.username;
	const password = req.body.password;

	var sql = mysql.format(
		"SELECT * FROM users WHERE username = ? AND password = ?",
		[username, password]
	);
	console.log("DEBUG: /basic/login => " + sql);
	connection.query(sql, (err, rows) => {
		if (err) {
			return res.json({
				success: false,
				data: null,
				error: err.message,
			});
		}

		numRows = rows.length;
		if (numRows == 0) {
			res.json({
				success: false,
				message: "Login credential is incorrect",
			});
		} else {
			res.json({
				success: true,
				message: "Login credential is correct",
				user: rows[0],
			});
		}
	});
});
Common problem you may found:
- The request lasts forever: The database credential or SQL statement may incorrect, so the database query takes forever. Double check your database connection and SQL statement.

- The SQL statement format as null value: the body variable and the body sent from the postman may have different name, so the code read variable that does not exist.

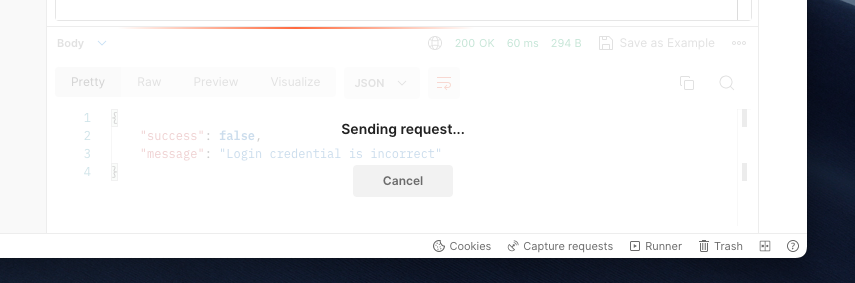

The result if you properly implement the functionality:
- Case of incorrect credential

- Case of correct credential
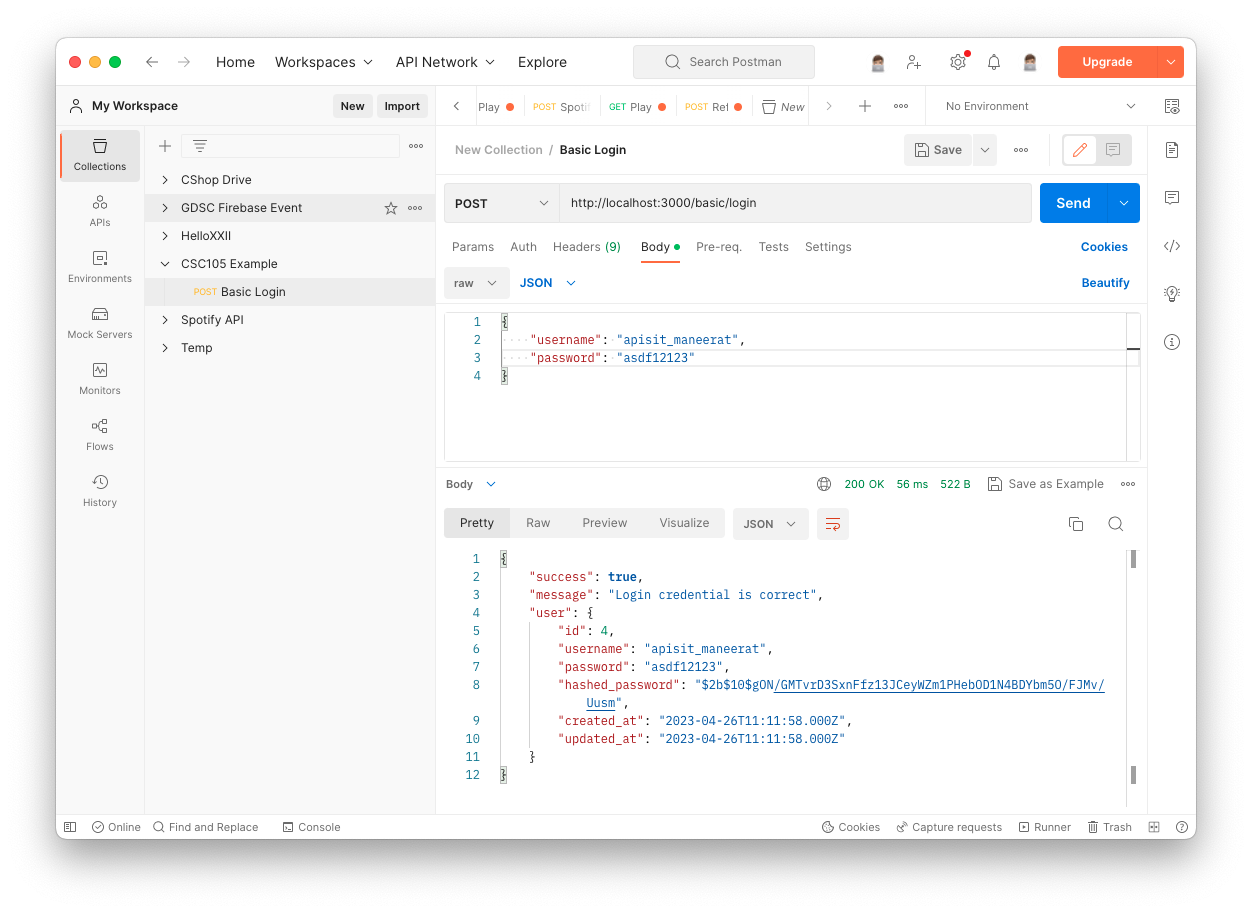


Remark: the whole user information should not be returned in the response like this in the real project implementation. We just shown this information just for an example of quering user data after logged in.
Password-hashed Authentication
After we have implemented a basic login endpoint. Have you spot the one security issue in the database?
"Database administrator can view everyone's password"
Practically, the password of a user should keep secret. But as we need to store password of a user for checking at the login endpoint. How can we securly store this information but seal it from database admin to view? The answer is hashing.
Hashing
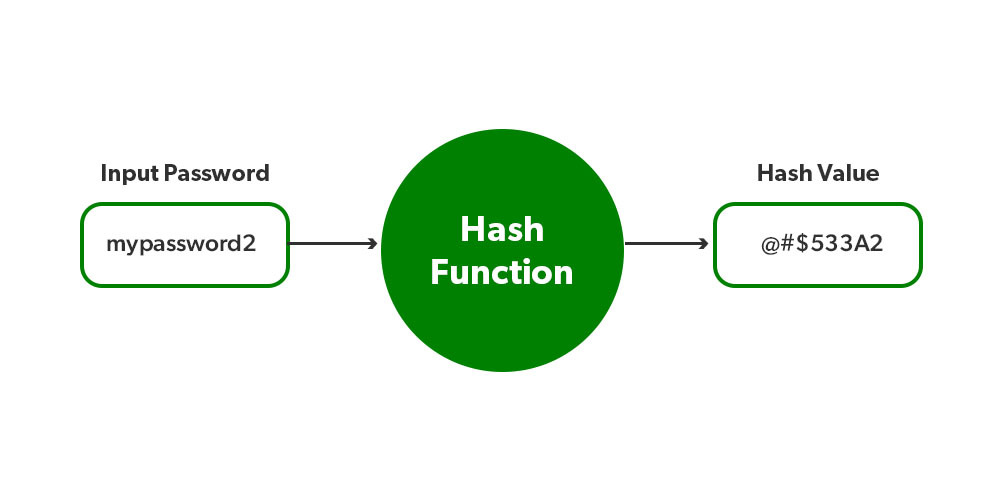
Again, try googling "what's hashing", you'll know the concept of how hashing works. The brief concept is hashing transform the plain text into a hash value which is irreversible. So database administrator cannot use stored hash value to transform back to original password. However, we can still check for correctness of the password by one property of a hash function, the same input password will be hashed into the same hash value.
 There's various of hashing algorithm to use for hashing password, you can learn more as follows:
- MD5
- Bcrypt
- Argon
- Google "password hashing algorithms"
Let's try hashing by example. Getting started with the most simplest one, MD5.
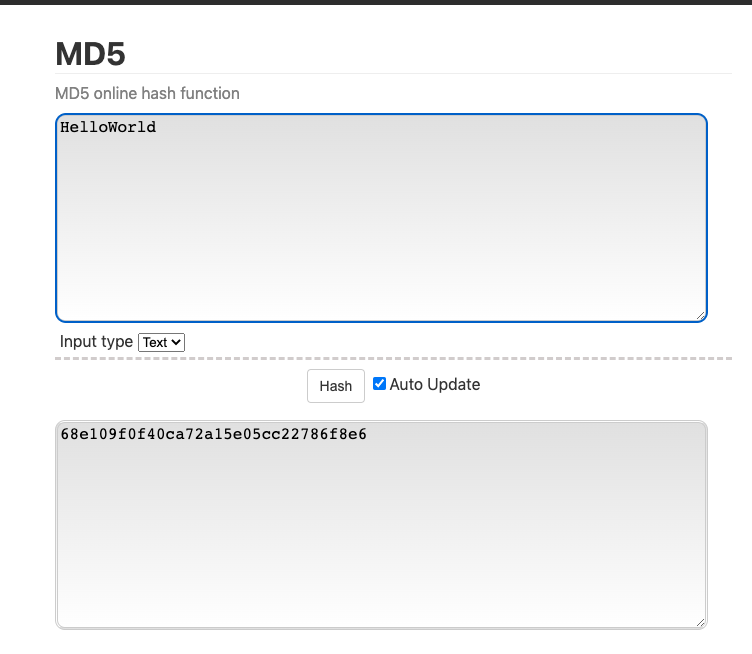
- Go to https://emn178.github.io/online-tools/md5.html which is online hashing demonstration tool.
- Try insert any original text, for example "HelloWorld".

- You will see "HelloWorld" will be hashed into "68e109f0f40ca72a15e05cc22786f8e6" and there's no way to decode back from the hashed value into "HelloWorld", except you're bruteforcing (Google "what's bruteforce hash value")
- If you hash the value of "HelloWorld" again, it should hashed into the same value "68e109f0f40ca72a15e05cc22786f8e6" which we can use for check at the database that the hash value is matched or not.
Hashing Login Implementation
Instead of using the username and password for querying at the database directly, we're query the hashed information from the database and use them for comparing with the recieved password in the body payload.
 We have created some proof-of-concept code of password hashing using bcrypt
const bcrypt = require("bcrypt");

// Hash 12345678
const example = async () => {
	const salt1 = await bcrypt.genSalt(10);
	console.log("Salt #1: ", salt1);
	const hash1 = await bcrypt.hash("12345678", salt1);
	console.log("Hash #1: ", hash1);

	const salt2 = await bcrypt.genSalt(10);
	console.log("Salt #2: ", salt2);
	const hash2 = await bcrypt.hash("asdf12123", salt1);
	console.log("Hash #2: ", hash2);

	const valid1 = await bcrypt.compare(
		"12345679",
		"$2b$10$fwkjdMXyeLb7DGaU2UKwTecPJfC7i3ktBP5pFwC3ov71dMSsehus2"
	);
	console.log("Validation #1: ", valid1);

	const valid2 = await bcrypt.compare(
		"12345679",
		"$2b$10$fwkjdMXyeLb7DGaU2UKwTecPJfC7i3ktBP5pFwC3ov71dMSsehus3" // Modify last charactor a little bit
	);
	console.log("Validation #2: ", valid2);

	const valid3 = await bcrypt.compare(
		"asdf12123",
		hash2 // Previously hgenerated hash
	);
	console.log("Validation #3: ", valid3);
};

example();
Let's run on your own machine and see the relation of console output and the code!
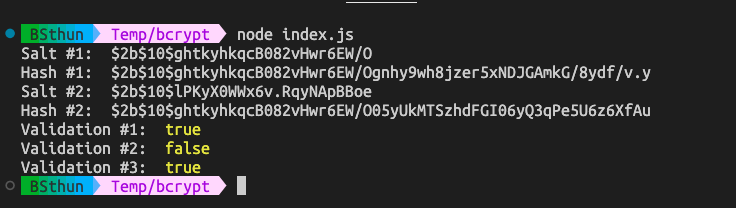
Remark: hashed value will not be the same as bcrypt use salt for making hash more secure (Google "bcrypt vs md5") but the validation will we something like this.
Implementation Task
Lastly, try implement new login endpoint using hashed password from the database and payload! it would be better if
Suggested resources are:
- Google "implement bcrypt in nodejs"
- Bcrypt Node.js documentation https://www.npmjs.com/package/bcrypt
No comments to display
No comments to display