IoT Lab - Basic & Setup
What is IoT?
IoT stands for Internet of Things. It refers to the interconnectedness of physical devices, such as appliances and vehicles, that are embedded with software, sensors, and connectivity which enables these objects to connect and exchange data and also integrates everyday “things” with the internet.
for more information https://aws.amazon.com/what-is/iot/
Today, we are going to learn the basics of IoT using ESP32-S which is a low-cost, low-power Microcontroller with integrated Wi-Fi and Bluetooth for connecting multiple accessories and making these devices connected to the internet.
The accessories we use today are ...
ESP32-S

for more information https://catalog.us-east-1.prod.workshops.aws/workshops/5b127b2f-f879-48b9-9dd0-35aff98c7bbc/en-US/module1/esp32
Breadboard
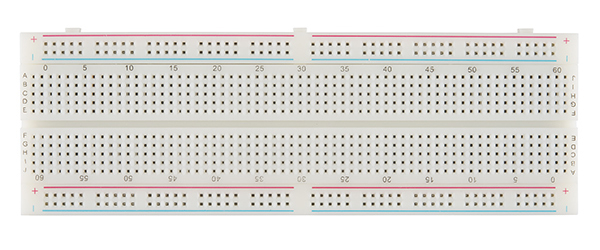
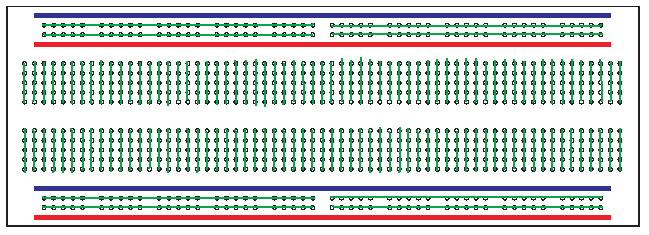
A breadboard (sometimes called a plug block) is used for building temporary circuits. It is useful to designers because it allows easily removing and replacing components. It is useful to the person who wants to build a circuit to demonstrate its action, then reuse the components in another circuit. (ref: https://www.sciencedirect.com/topics/engineering/breadboard)
ESP32 Board basic
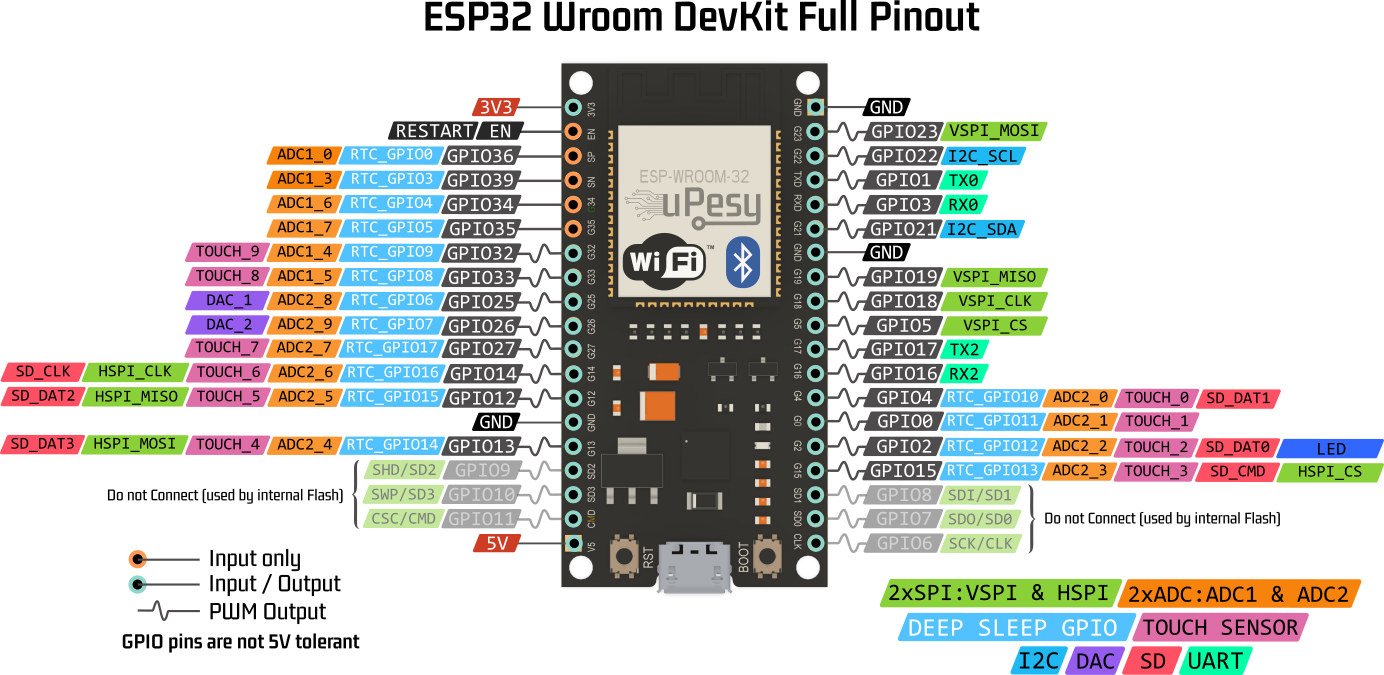
1. GPIO Pins
for more information https://espressif-docs.readthedocs-hosted.com/projects/arduino-esp32/en/latest/api/gpio.html
2. 5V and 3V3 Pins
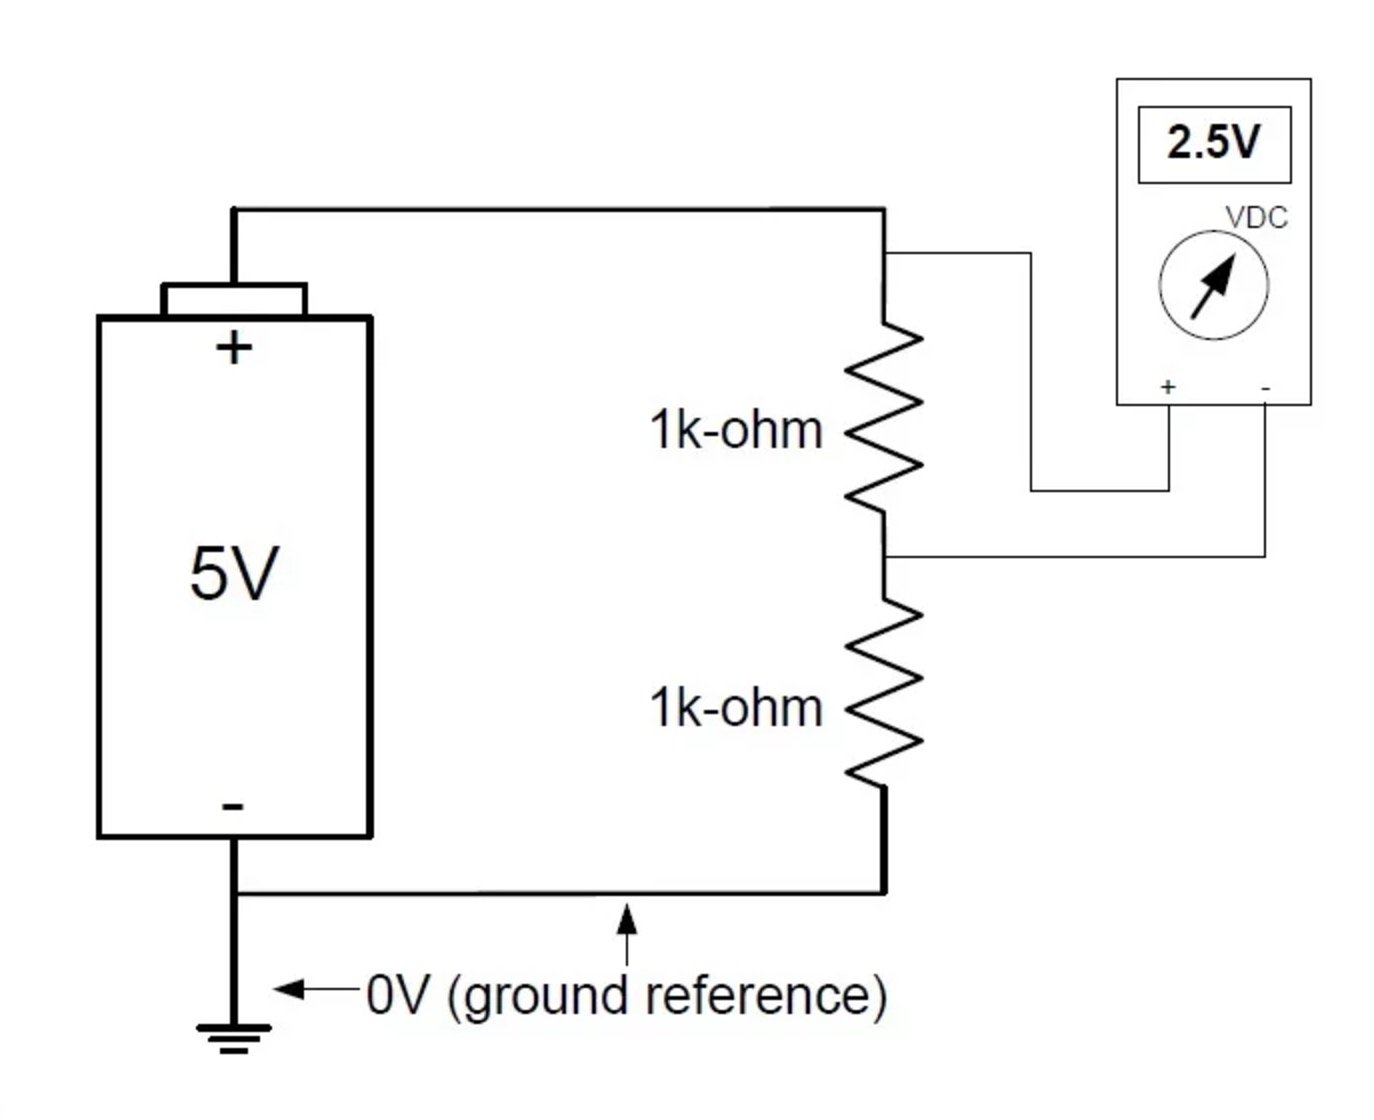
3. GND (Ground pin)
Setup the ESP32
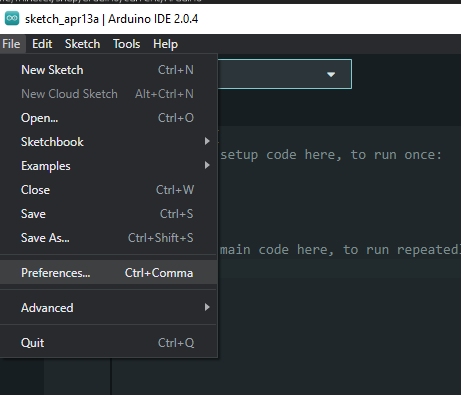
File > Preference
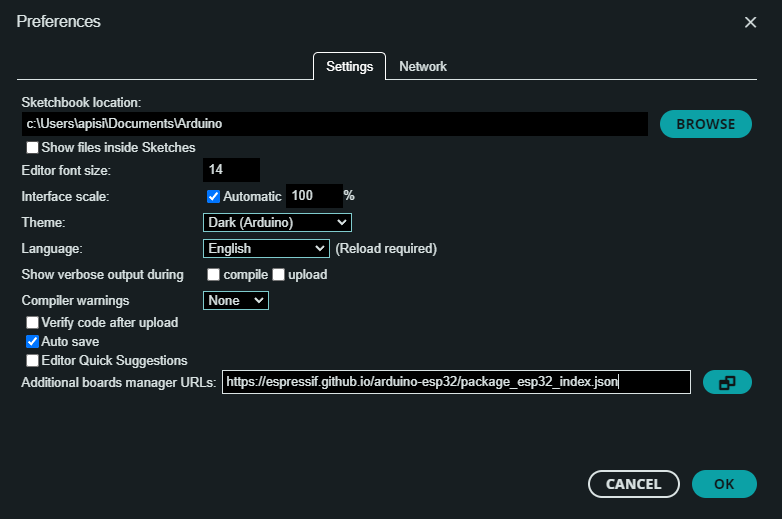
paste this link https://espressif.github.io/arduino-esp32/package_esp32_index.json to the Additional boards manager URLs then click OK.
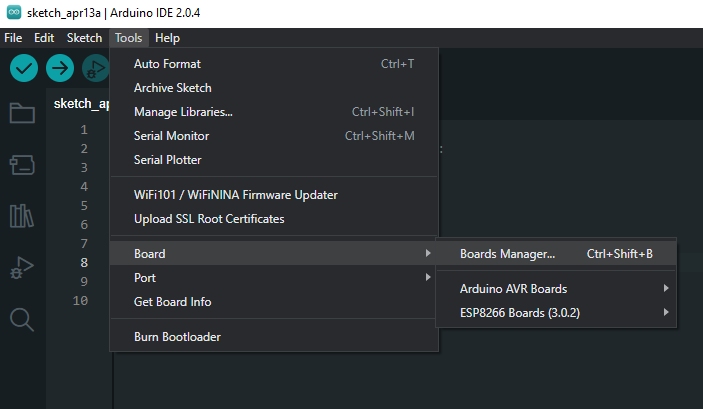
Go to Tools > Board > Board manager...
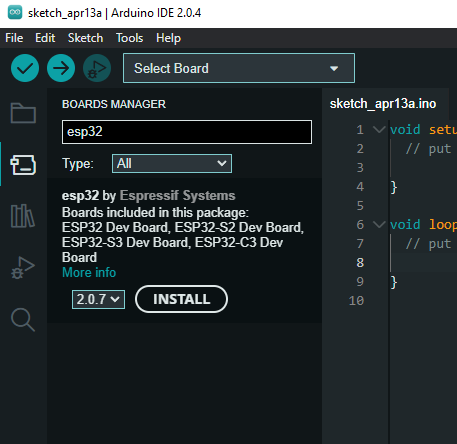
Search esp32 and click install library esp32 by Espressif Systems
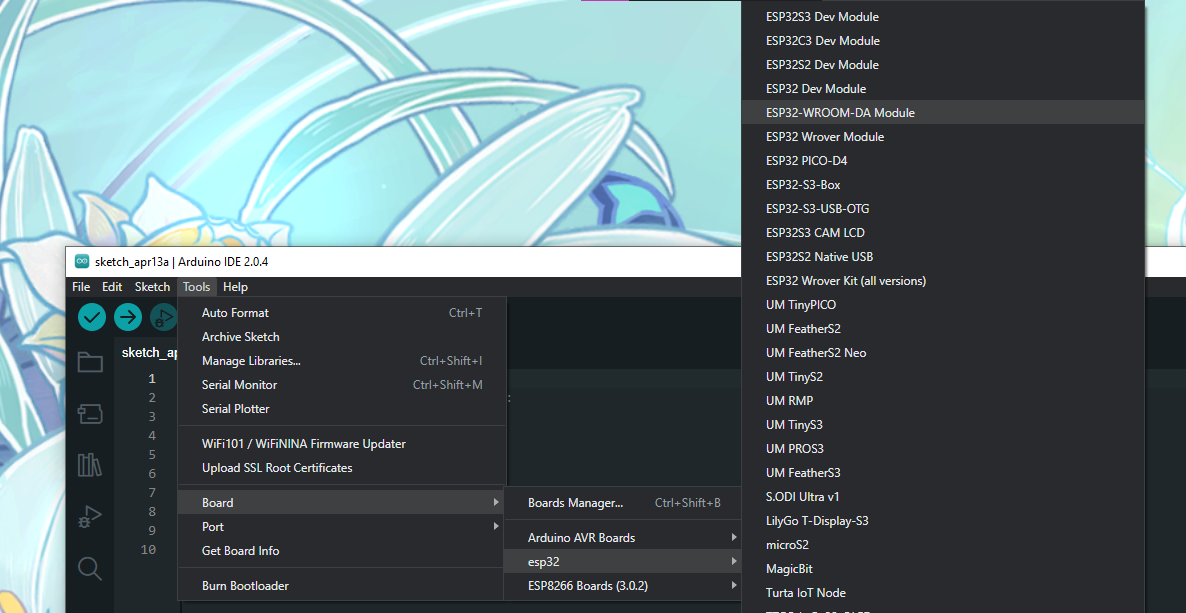
After installed the library, go to select the board through Tools > Board > esp32 > ESP32-WROOM-DA Module
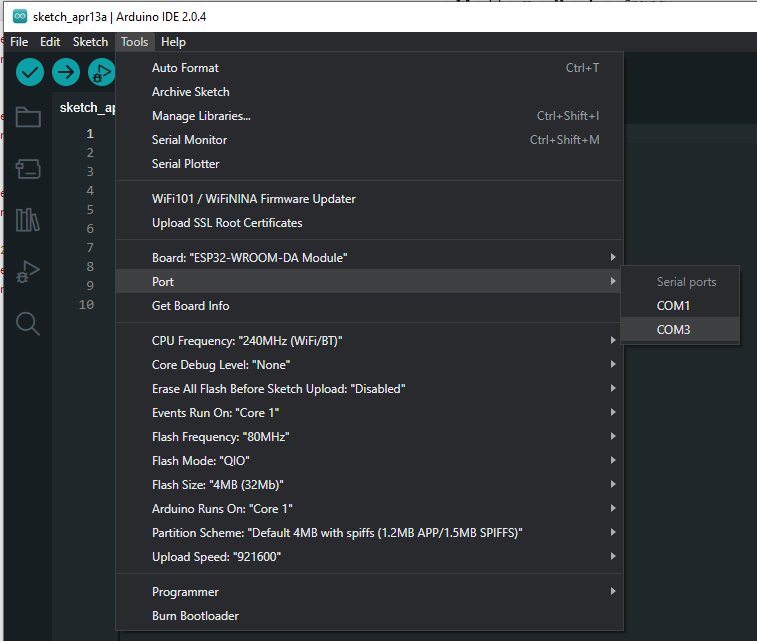
Select the USB port that you have connected to the ESP32 at Tools > Port > COMX (Each computer may see the different number)
Basic programming with Arduino
Arduino uses C language to write the code to operate your Microcontroller.
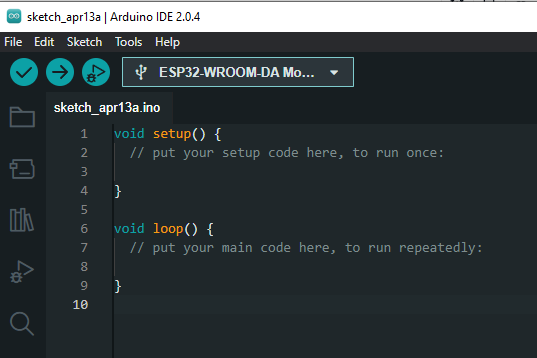
The basic operation to control your Microcontroller has only 2 main functions
void setup()
The first function to be executed in the sketch and it is executed only once. It usually contains statements that set the pin modes on the Arduino to OUTPUT and INPUT,
void loop() The function that executes indefinitely until you power off the Arduino
Blink
Blink is the basic operation that test your Microcontroller is working and connecting with your computer or not, write the following code...
// GPIO2 is the LED on board for ESP32, and we define as a varible LED
#define LED  2

void setup() {
  // put your setup code here, to run once:

  // We initialize the Pin GPIO2 as an OUTPUT
   pinMode(LED,OUTPUT);
}

void loop() {
  // put your main code here, to run repeatedly:
  delay(500);
  digitalWrite(LED,HIGH);  // turn the LED on (HIGH is the voltage level)
  delay(500);
  digitalWrite(LED,LOW);  // turn the LED off by making the voltage LOW
}
And click Upload at the right arrow top at the left of the program
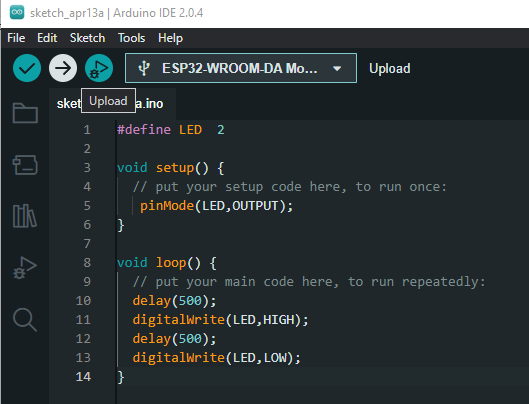
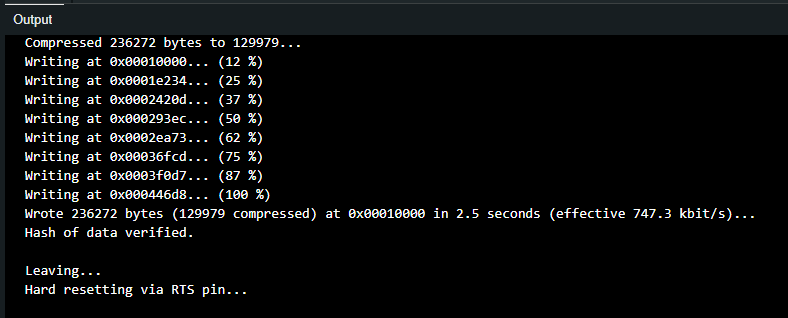
Check if your Microcontroller is blinking after the Arduino uploads your code.