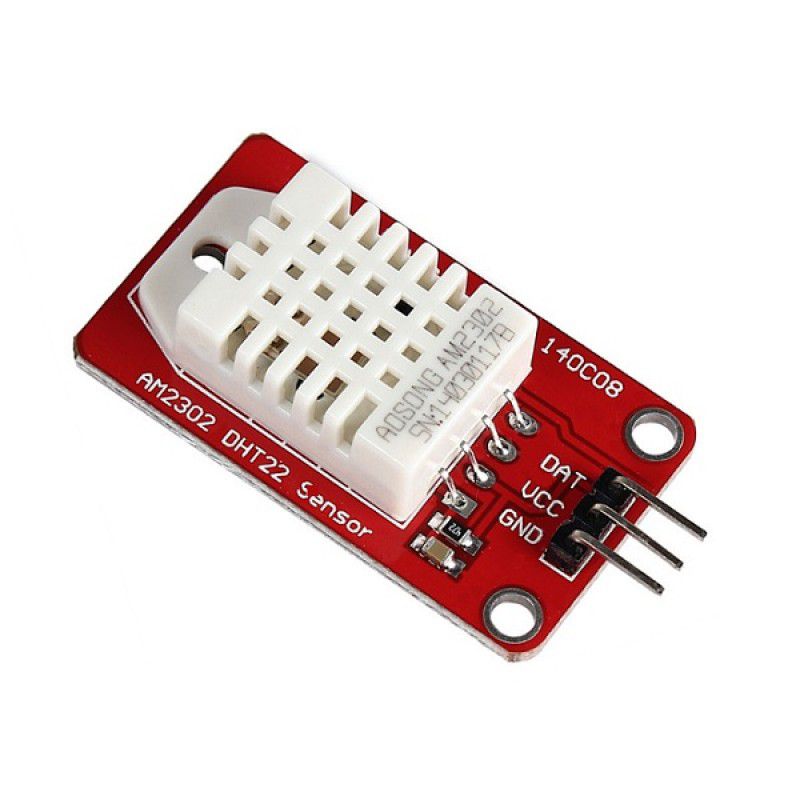
IoT Lab - Humidity Sensor Example
The sensor used for measuring temperature and humidity of the surrounding environment. The box contains AM2302 DHT22 sensor which are the temperature and humidity which outout calibrated digital signal for the data.
Searching Guide
When you want to try to use any sensor, the common properties of every sensor is
- VCC (aka. 5V, 3.3V, +, etc.) is the pin for the higher voltage power input
- GND (aka. Ground, -, etc.) is the pin for lower voltage (ground) power input
- DAT (aka. DATA, GPIO, etc.) is the pin for trasmitting data, sometimes in Digital, Analog, or both. It may contains one or more data pins.
Then, let's try googling the information of sensor, as we want to know how to connect these sensors to the controller board (Ardiono). The suggested keywords are
- <sensor model (AM2302 DHT22)> datasheet
- <sensor model> pinout / pinmap
- <sensor model> library arduino
- <sensor model> tutorial
- <sensor model> wiring
- <sensor model> data output type
- <sensor model> arduino code example
- <sensor model> with esp32 example
Code Example
Once you tried searching some code, you might end up which some search results. The example one for using DHT22 sensor is:
#include "DHT.h"

#define DHTPIN 2     // what pin we're connected to
#define DHTTYPE DHT22   // DHT 22  (AM2302)

DHT dht(DHTPIN, DHTTYPE);

void setup() {
  Serial.begin(9600);
  dht.begin();
}

void loop() {
  // Wait a few seconds between measurements.
  delay(2000);

  // Reading temperature or humidity takes about 250 milliseconds!
  // Sensor readings may also be up to 2 seconds 'old' (its a very slow sensor)
  float h = dht.readHumidity();
  // Read temperature as Celsius
  float t = dht.readTemperature();

  // Check if any reads failed and exit early (to try again).
  if (isnan(h) || isnan(t)) {
    Serial.println("Failed to read from DHT sensor!");
    return;
  }

  Serial.print("Humidity: ");
  Serial.print(h);
  Serial.print(" %\t");
  Serial.print("Temperature: ");
  Serial.print(t);
  Serial.println(" *C ");
}
(Copied from https://www.electroschematics.com/arduino-dht22-am2302-tutorial-library/)
In the example code above, you will see HDTPIN (LINE 3) that you need to specify your own pin number the retrieve data from the sensor which can be varies depend on your pin mapping.
Understanding logic
From the code example above, we could found that there's code point as following:
- Ln 3-4:
defineused for define constants variable. DHTPIN specify the pin that data pint of DHT22 sensor connected to. DHTTYPE specify the model of the sensor, which will be used in the library. - Ln 7: Create a variable typed
DHTnameddhtby using 2 argruments (DHTPIN, DHTTYPE) as a constructor, which used for initialize the DHT sensor connection - Ln 10: Initialize DHT sensor by calling method
begin()of theDHTinstance nameddht. - Ln 19, 21: Call the method
readHumidity()andreadTemperature()of theDHTinstance nameddht, which will be return the float variable indicating the value of sensor. - Ln 24: Checking that the value returned is proper readable, if it's Not-a-Number (nan) it means that the reading is error.
- Ln 29-34: Print the value back to serial moniter.


No Comments