Setup ESP32 with Arduino
- Download the Arduino program via https://www.arduino.cc/en/software
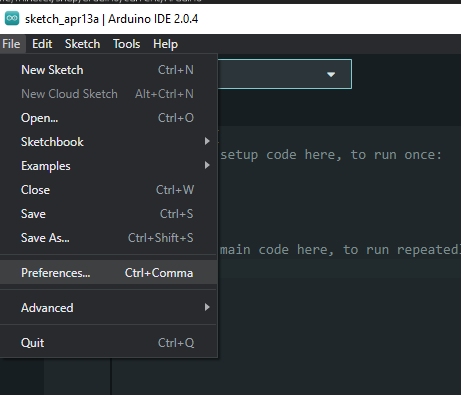
- Open the Arduino program
- Go to
File > Preference
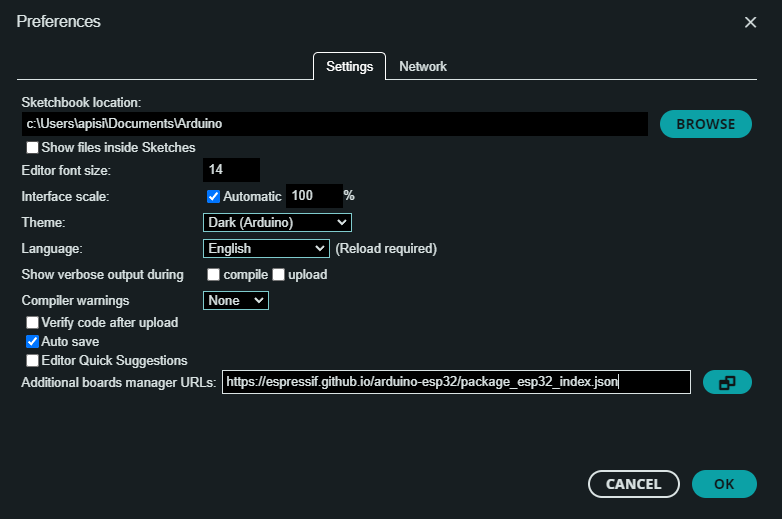
paste this link
https://espressif.github.io/arduino-esp32/package_esp32_index.json
to the Additional boards manager URLs then click OK.
-
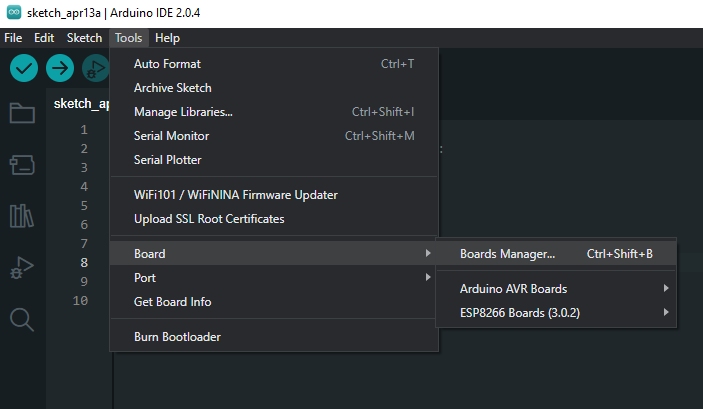
Go to
Tools > Board > Board manager...
-
Search
esp32and clickinstalllibraryesp32 by Espressif Systems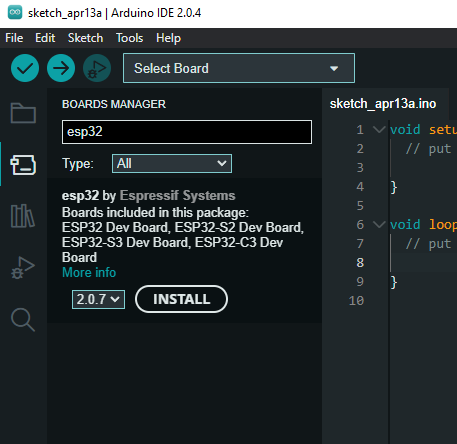
-
After installed the library, go to select the board through
Tools > Board > esp32 > ESP32-WROOM-DA Module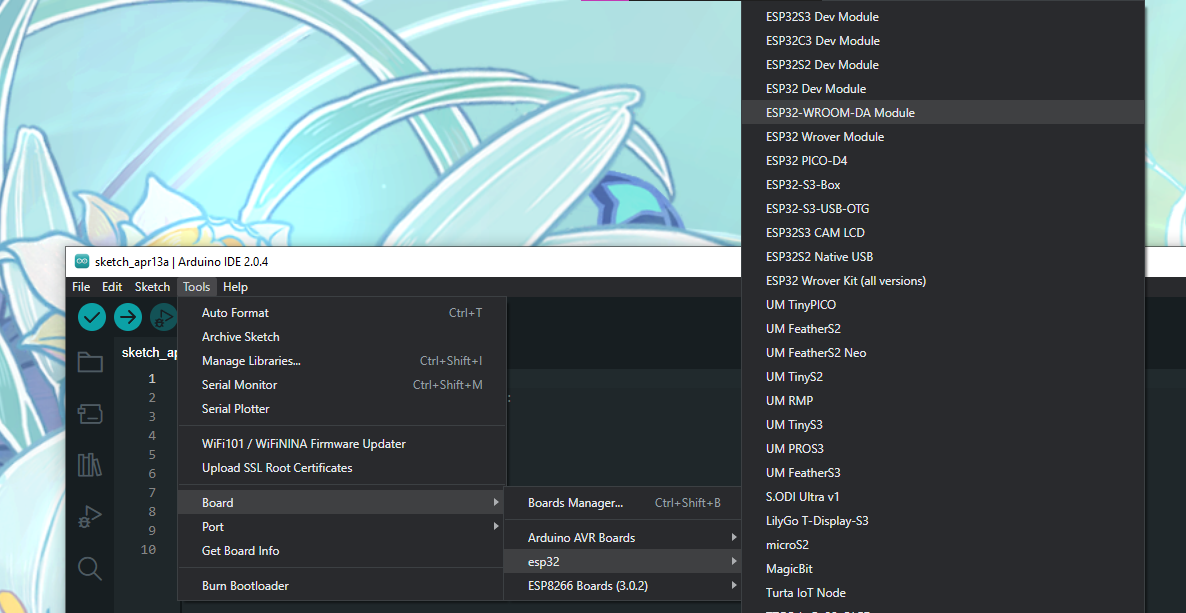
-
Select the USB port that you have connected to the ESP32 at
Tools > Port > COMX (Each computer may see the different number)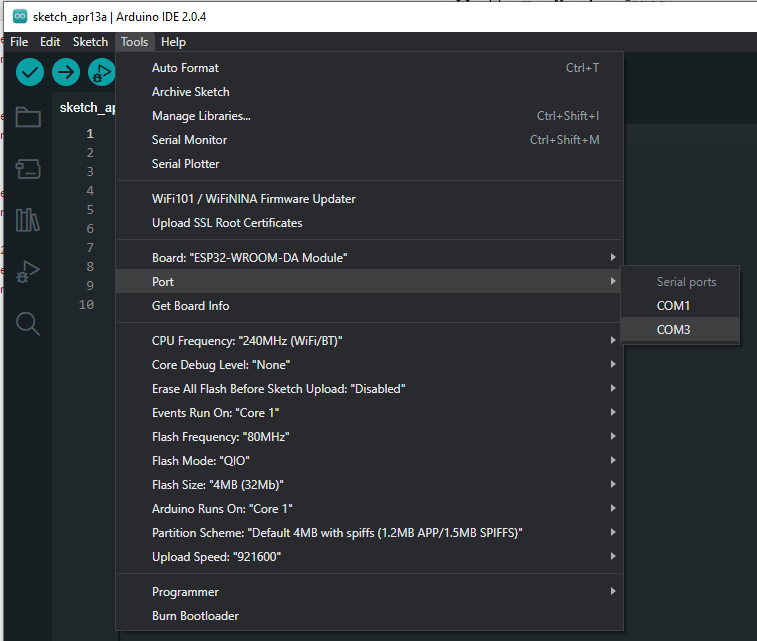


Test with Blink
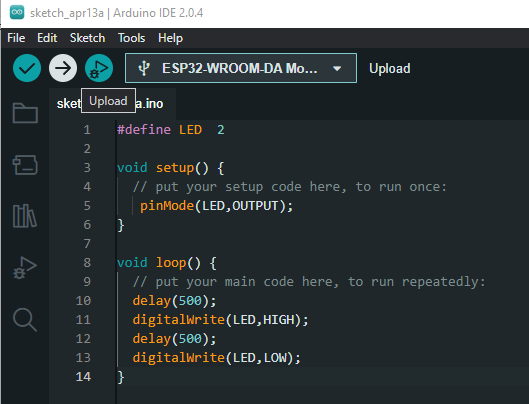
Blink is the basic operation that test your Microcontroller is working and connecting with your computer or not, write the following code...
// GPIO2 is the LED on board for ESP32, and we define as a varible LED
#define LED  2

void setup() {
  // put your setup code here, to run once:

  // We initialize the Pin GPIO2 as an OUTPUT
   pinMode(LED,OUTPUT);
}

void loop() {
  // put your main code here, to run repeatedly:
  delay(500);
  digitalWrite(LED,HIGH);  // turn the LED on (HIGH is the voltage level)
  delay(500);
  digitalWrite(LED,LOW);  // turn the LED off by making the voltage LOW
}
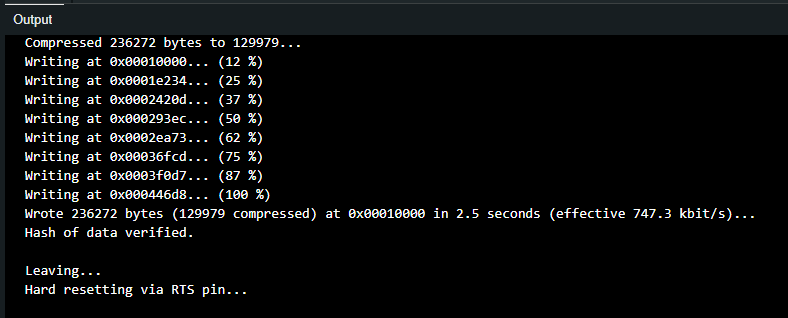
And click Upload at the right arrow top at the left of the program
Check if your Microcontroller is blinking after the Arduino uploads your code.
No comments to display
No comments to display