IoT Lab - ESP32 with Ultrasonic Sensor
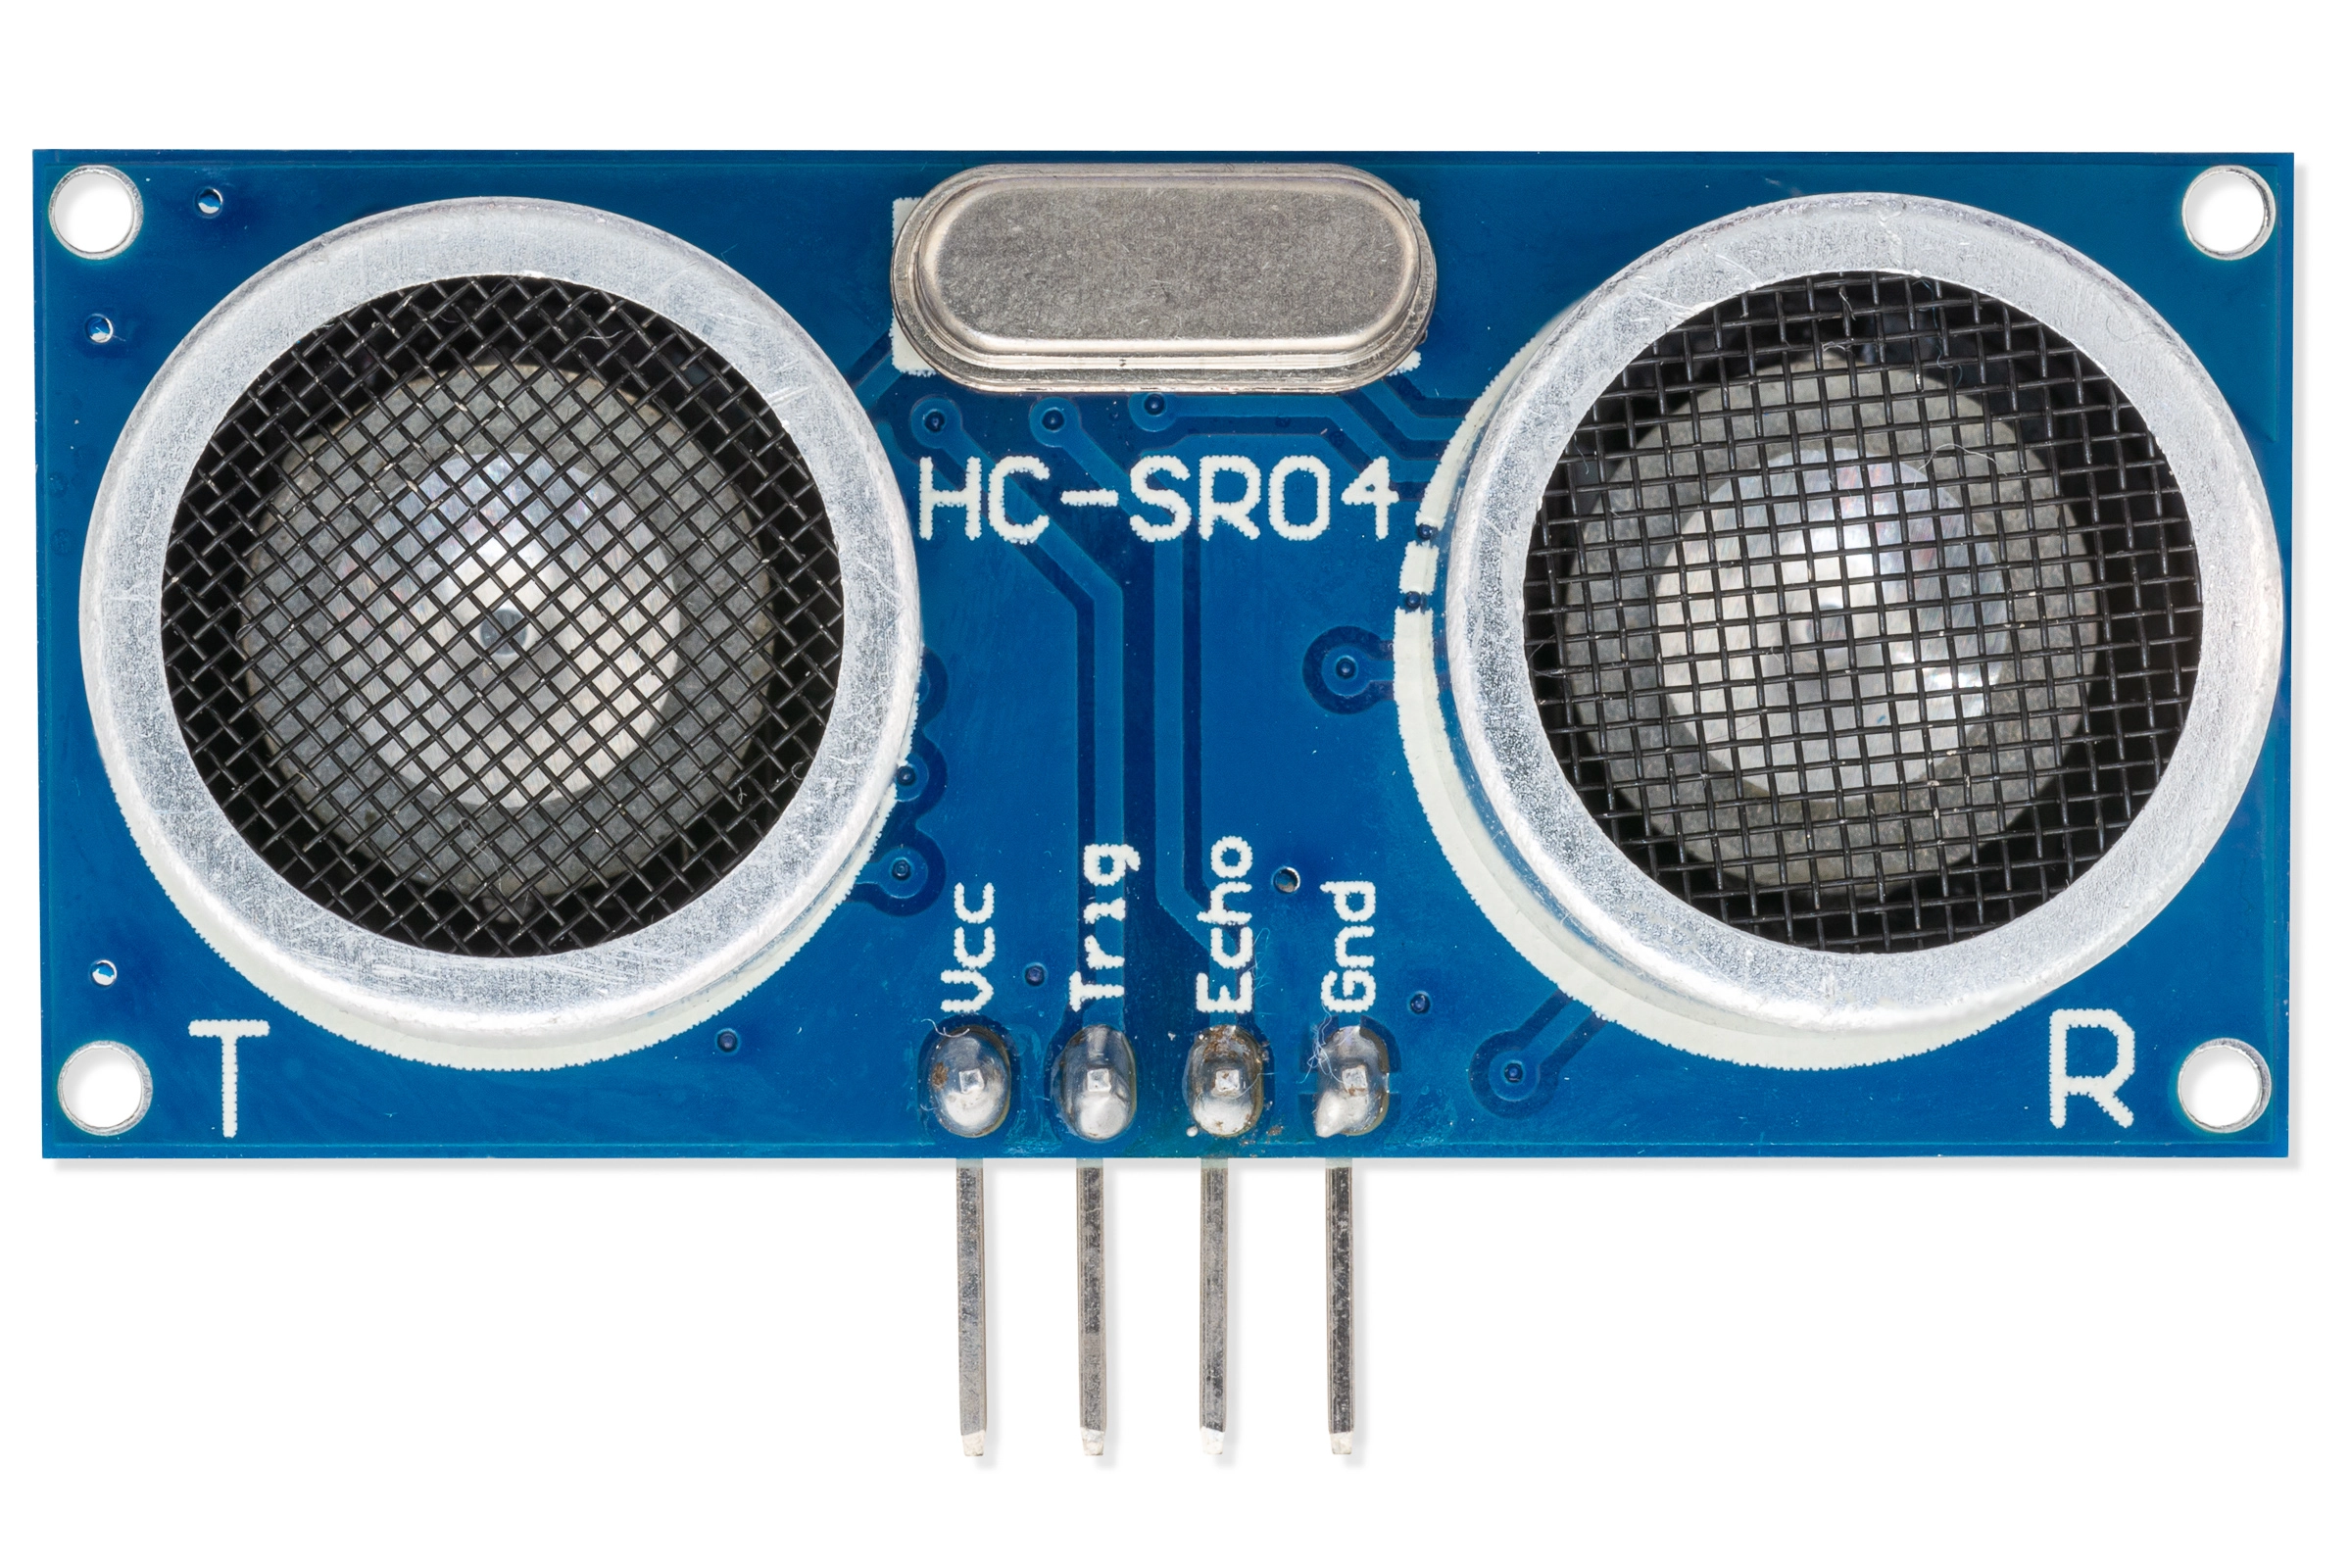
The ultrasonic sensor uses sonar to determine the distance to an object. This sensor reads from 2cm to 400cm (0.8inch to 157inch) with an accuracy of 0.3cm (0.1inches), which is good for most hobbyist projects. In addition, this particular module comes with ultrasonic transmitter and receiver modules.
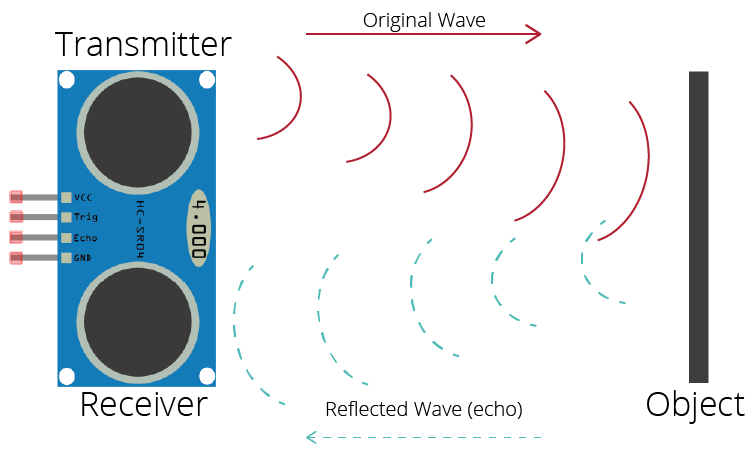
How Does the Ultrasonic Sensor Work?
1. The ultrasound transmitter (trig pin) emits a high-frequency sound (40 kHz).
2. The sound travels through the air. If it finds an object, it bounces back to the module.
3. The ultrasound receiver (echo pin) receives the reflected sound (echo).
Schematic – ESP32 with Ultrasonic Sensor
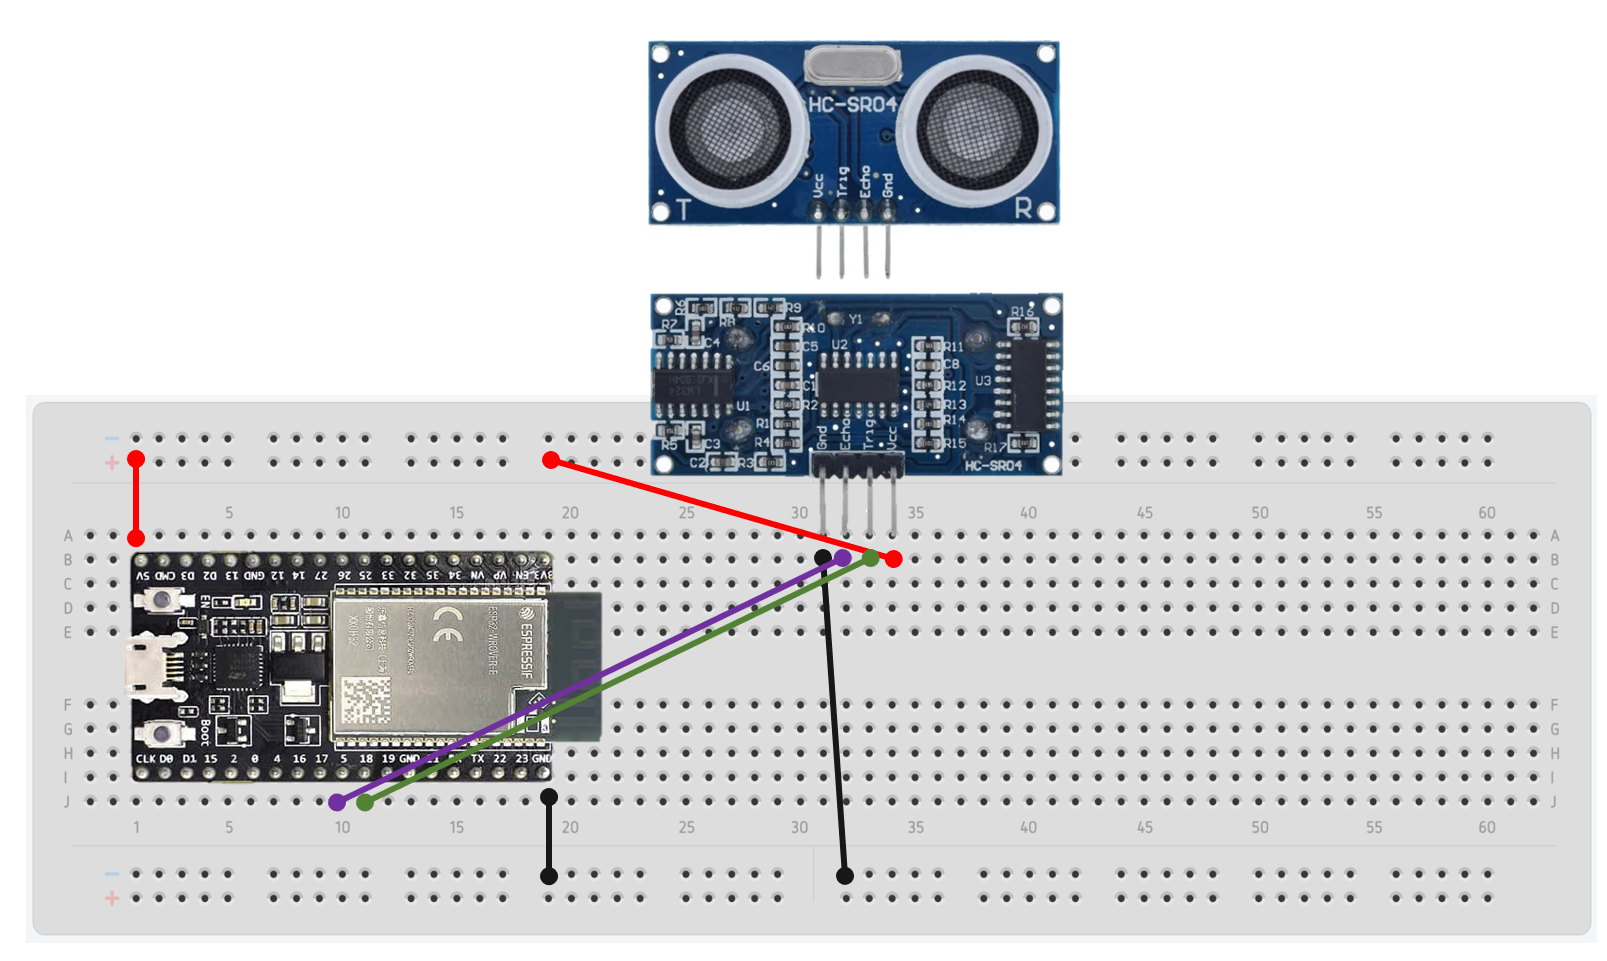
Wire the Ultrasonic sensor to the ESP32 as shown in the following schematic diagram. We’re connecting the Trig pin to GPIO 18 and the Echo pin to GPIO 5, but you can use any other suitable pins.
Code
const int trig = 18; // trigger pin
const int echo = 5; // echo pin
long duration, distance;

// The `soundSpeed` variable saves the velocity of sound in the air at 20ºC. We’re using the value in cm/uS
const float soundSpeed = 0.034;

void setup() {
  // put your setup code here, to run once:

  //  This tells the ESP32 to get ready to exchange messages with the Serial Monitor at a data rate of 9600 bits per second.  That’s 9600 binary ones or zeros per second, and is commonly called a baud rate.
  Serial.begin(115200);
  pinMode(echo, INPUT); // Set the echo pin to be an input
  pinMode(trig, OUTPUT); // Set the trig pin to be an output
}

void loop() {
  // put your main code here, to run repeatedly:

  digitalWrite(trig, LOW); // Clear the trig pin
  delayMicroseconds(5);

  digitalWrite(trig, HIGH);  // Sets the trig pin on HIGH state for 10 micro seconds
  delayMicroseconds(10);
  digitalWrite(trig, LOW);

  duration = pulseIn(echo, HIGH); // Read the value from echo pin

  distance = (duration * soundSpeed/2); // Calculate to centimeters.

  Serial.print(distance);
  Serial.print(" cm\n");
}
After that, save your code and upload your code to the microcontroller.
When your code uploads completely, you can see the Serial Monitor which is a console of your microcontroller by clicking the Magnifier icon at the top right of the screen.
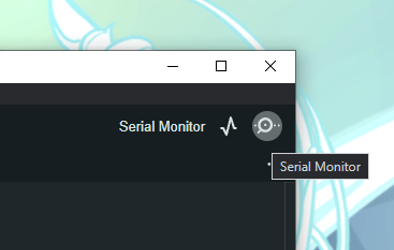
In the Serial monitor you can change the speed of exchange messages with the Serial Monitor and microcontroller by clicking the dropdown at the bottom right of the screen. (The speed should be the same with your speed in the code Serial.begin(115200))
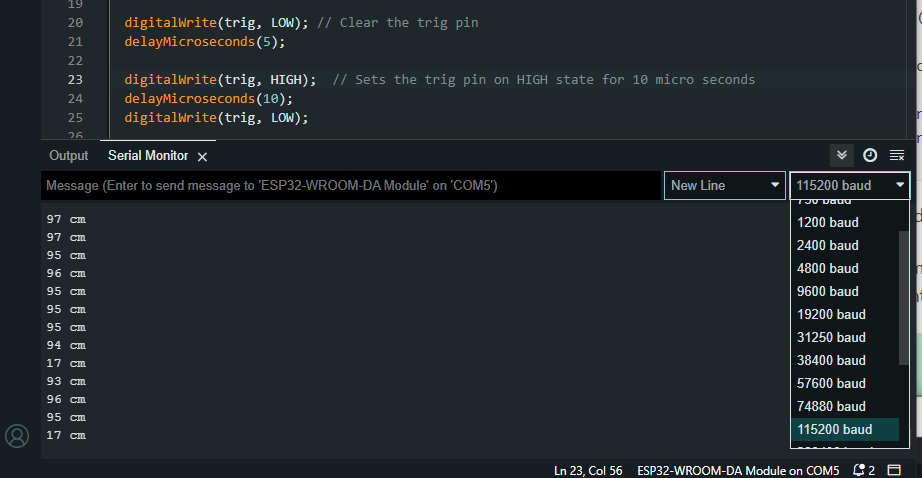
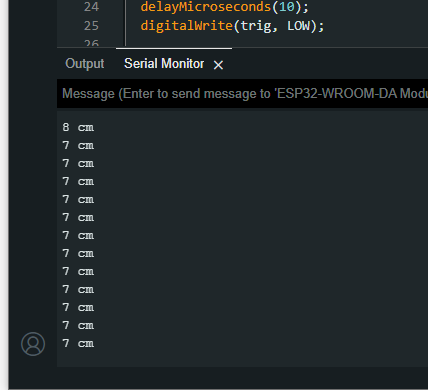
After that, The sensor measurements will be displayed in the Serial Monitor.
credit https://randomnerdtutorials.com/esp32-hc-sr04-ultrasonic-arduino/
Integrate with LED lights
Schematic – ESP32 with Ultrasonic Sensor and LED Lights
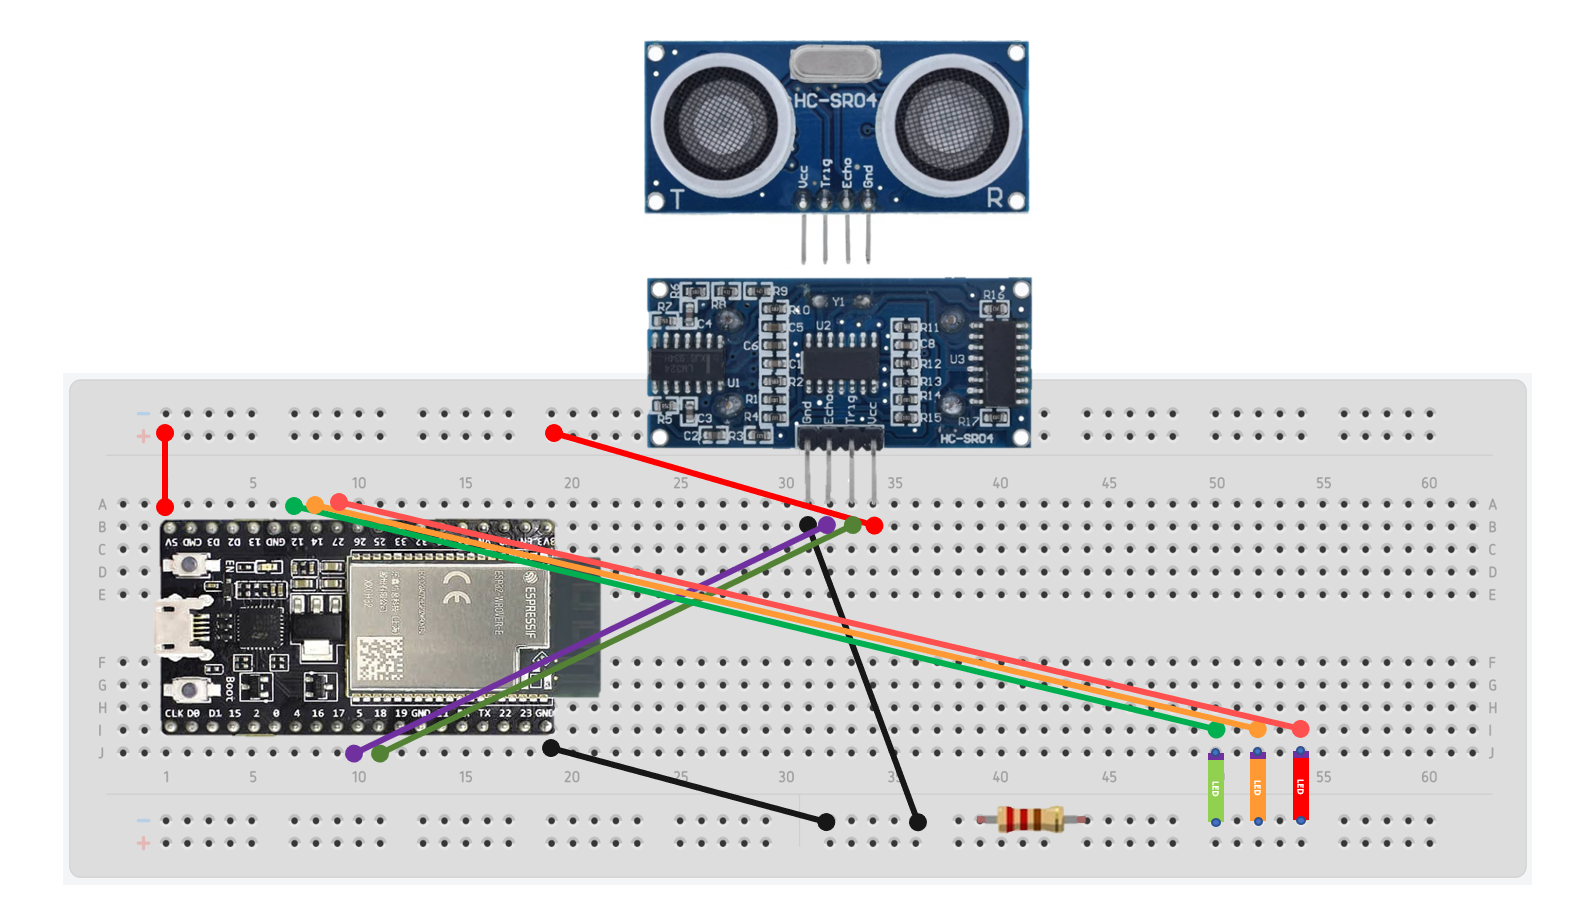
- The purple mark at the LED icon is the longest side of the wire.
- We need the resistor in the circuit because we need to limit the current through the LED and prevent excess current that can burn out the LED.
Code
const int trig = 18; // trigger pin
const int echo = 5; // echo pin
long duration, distance;

// The `soundSpeed` variable saves the velocity of sound in the air at 20ºC. We’re using the value in cm/uS
const float soundSpeed = 0.034;

int greenLed = 12; // LED pin
int yellowLed = 14;
int redLed = 27;

void setup() {
  // put your setup code here, to run once:

  //  This tells the ESP32 to get ready to exchange messages with the Serial Monitor at a data rate of 9600 bits per second.  That’s 9600 binary ones or zeros per second, and is commonly called a baud rate.
  Serial.begin(115200);
  pinMode(echo, INPUT); // Set the echo pin to be an input
  pinMode(trig, OUTPUT); // Set the trig pin to be an output

  pinMode(greenLed, OUTPUT); // Set the LED pin as an OUTPUT
  pinMode(yellowLed, OUTPUT);
  pinMode(redLed, OUTPUT);
}

void loop() {
  // put your main code here, to run repeatedly:

  digitalWrite(trig, LOW); // Clear the trig pin
  delayMicroseconds(5);

  digitalWrite(trig, HIGH);  // Sets the trig pin on HIGH state for 10 micro seconds
  delayMicroseconds(10);
  digitalWrite(trig, LOW);

  duration = pulseIn(echo, HIGH); // Read the value from echo pin

  distance = (duration * soundSpeed/2); // Calculate to centimeters.

  Serial.print(distance);
  Serial.print(" cm\n");

  /*
   For LED
   LOW - turn off
   HIGH - turn on
  */

  if (distance <= 10) {
    digitalWrite(greenLed,LOW);
    digitalWrite(yellowLed,LOW);
    digitalWrite(redLed,HIGH); // turn red light on
  } else if (distance >= 20 && distance <= 50) {
    digitalWrite(greenLed,LOW);
    digitalWrite(yellowLed,HIGH); // turn yellow light on
    digitalWrite(redLed,LOW);
  } else {
    digitalWrite(greenLed,HIGH); // turn green light on
    digitalWrite(yellowLed,LOW);
    digitalWrite(redLed,LOW);
  }
}
No comments to display
No comments to display